SSL must be configured before you can log in. When you open the app for the first time, you will be redirected to the HTTPS setup screen automatically.
Overview — Secure your workspace in 3 steps
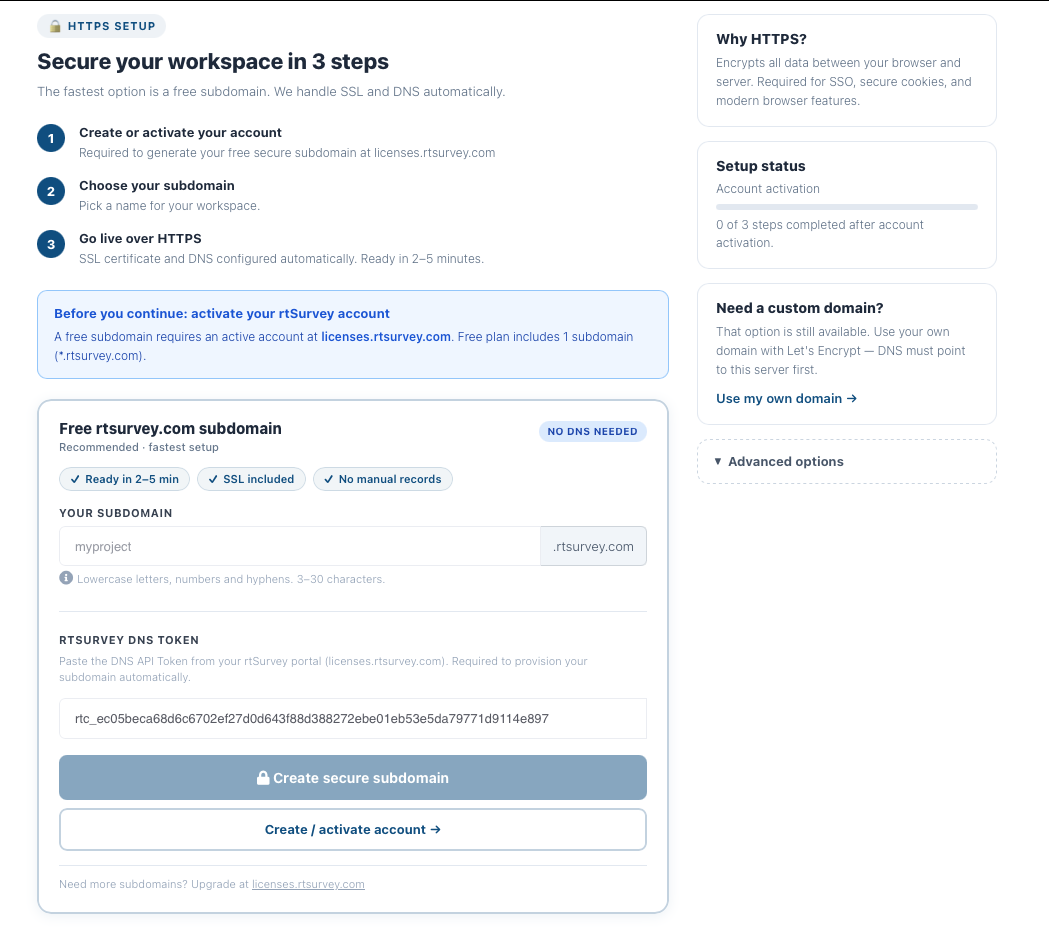
The setup screen walks you through three steps:
| Step | Action | Details |
|---|---|---|
| 1 | Create or activate your account | Required to generate your free secure subdomain at licenses.rtsurvey.com (opens in a new tab) |
| 2 | Choose your subdomain | Pick a name for your workspace |
| 3 | Go live over HTTPS | SSL certificate and DNS configured automatically. Ready in 2–5 minutes |
Why HTTPS? Encrypts all data between your browser and server. Required for SSO, secure cookies, and modern browser features.
Option 1 — Free rtsurvey.com subdomain (Recommended)
No DNS NEEDED · Ready in 2–5 min · SSL included · No manual records
Before you continue: activate your rtSurvey account. A free subdomain requires an active account at licenses.rtsurvey.com (opens in a new tab). Free plan includes 1 subdomain (
*.rtsurvey.com). If you don't have an account yet, click Create / activate account → on the setup screen first.
-
In the YOUR SUBDOMAIN field, type your desired subdomain name
Use lowercase letters, numbers, and hyphens. 3–30 characters. Example:
myproject→myproject.rtsurvey.com -
Paste your rtSurvey DNS Token from licenses.rtsurvey.com (opens in a new tab) into the token field
-
Click Create secure subdomain
Once submitted, the app will start provisioning automatically:

The four steps run automatically:
- Requesting DNS record — creates the DNS entry for your subdomain
- Waiting for DNS to propagate — usually 2–5 minutes
- Issuing SSL certificate — Let's Encrypt signs your certificate
- Activating HTTPS — Nginx reloads with the new certificate
Once complete, you will be redirected to your new HTTPS URL automatically.
Need more subdomains? Upgrade at licenses.rtsurvey.com (opens in a new tab).
Option 2 — My own domain
Click Use my own domain → in the sidebar, or expand Advanced options on the setup screen.
Use this if you have an existing domain and its DNS A record already points to this server's IP.
- Enter your full domain name (e.g.
survey.myorganization.org) - Click Create certificate
Let's Encrypt will verify your domain and issue a certificate. This requires DNS to be correctly pointed first — the request will fail otherwise.
Option 3 — Install certificate manually (Advanced)
Expand Advanced options on the setup screen for manual certificate installation.
For enterprise environments using a custom or internal CA. You will place your certificate files on the server via SSH, then enter your domain in the app.
Prerequisites
- SSH access to the server
- A valid certificate and private key for your domain (PEM format)
Step 1 — SSH into the server
ssh root@<server-ip>Step 2 — Place your certificate files
Create the directory and copy your files:
mkdir -p /etc/letsencrypt/live/<your-domain>Copy your files into that directory with these exact names:
| File | Description |
|---|---|
fullchain.pem | Your certificate + any intermediate CA certificates (concatenated) |
privkey.pem | Your private key |
Example:
# Copy from your local machine (run this locally, not on the server)
scp fullchain.pem root@<server-ip>:/etc/letsencrypt/live/<your-domain>/fullchain.pem
scp privkey.pem  root@<server-ip>:/etc/letsencrypt/live/<your-domain>/privkey.pem
Set correct permissions:
chmod 644 /etc/letsencrypt/live/<your-domain>/fullchain.pem
chmod 600 /etc/letsencrypt/live/<your-domain>/privkey.pem
Step 3 — Enter your domain in the app
- In the SSL setup screen, click Install certificate manually
- Enter your domain name (must match the certificate's Common Name or SAN)
- Click Apply
The server will configure Nginx with your certificate and reload automatically.
Troubleshooting
Certificate issuance failed
All SSL options (including free *.rtsurvey.com subdomains) use Let's Encrypt and require:
-
Port 80 open — Let's Encrypt's ACME HTTP challenge must reach the server on port 80. Check your cloud firewall:
- AWS: Security Group inbound rule — TCP 80 from
0.0.0.0/0 - GCP: VPC firewall rule
default-allow-http— TCP 80 - Linode: Cloud Firewall inbound — TCP 80
- AWS: Security Group inbound rule — TCP 80 from
-
DNS pointing to this server — Run from your local machine:
dig +short your-domain.com @8.8.8.8
# Must return this server's IP
The setup script waits up to 15 minutes for DNS propagation before timing out.
Check the SSL log
sudo tail -100 /var/log/rtsurvey-ssl.logThe log shows DNS propagation progress, certbot output, and any error messages.
Check SSL trigger status
cat /opt/rtsurvey/ssl-trigger/status.json| Status | Meaning |
|---|---|
none | No SSL request submitted yet |
pending | SSL issuance in progress |
active | SSL active — includes cert_expires field |
error | Failed — check error field for details |
Re-trigger SSL setup
If setup failed (e.g. DNS wasn't ready), fix the issue then re-trigger:
echo '{"domain":"your-domain.com","type":"certbot","email":"you@example.com"}' \
  > /opt/rtsurvey/ssl-trigger/request.json
Watch progress:
sudo tail -f /var/log/rtsurvey-ssl.log